Did My Sweep Do the Work?
Post-service checklist to verify the work was actually performed.
A chimney sweep tells you the liner is cracked and needs to be replaced for $4,000. Is this legitimate or an upsell? According to VoC research across multiple homeowner forums, chimney relining is one of the most frequently upsold repairs in the industry — and also one of the most genuinely necessary when the underlying flue really is damaged. The difficulty for homeowners is that they cannot see the liner to verify either the problem or the repair.
This guide is the consumer reference for chimney relining. It covers what a liner does, the four common liner types, the specific conditions under which relining is actually required by NFPA 211, the conditions where relining is typically an upsell, and how to verify that a liner you paid for was actually installed. The canonical VoC case on this scam is a homeowner who paid $3,500 for a stainless steel liner that was never installed — the fraud was confirmed in small-claims court after a second operator's camera scan found the original clay tile still in place.
A chimney liner is the inner surface of the flue — the sleeve inside the masonry chimney that contains combustion gases, heat, and creosote as they move from the appliance up and out of the building. The liner performs three essential functions: it contains heat so the surrounding masonry and framing do not ignite, it contains combustion gases so carbon monoxide does not enter the living space, and it provides a smooth interior that resists creosote accumulation and permits safe sweeping.
A chimney without a functioning liner is not safe to use with any solid-fuel appliance. A damaged liner — cracked, spalled, or separated at the joints — can permit heat transfer to framing, carbon monoxide leakage into interior spaces, or spark escape into the wall cavity. These are genuine safety concerns, which is why relining is a legitimate repair category. But the fact that relining is a legitimate repair does not mean every relining quote is legitimate.
On an annual Level 1 inspection, a flue with an intact liner shows: continuous surface with no visible cracks, no mortar gaps between tile sections (in clay-lined flues), no spalling or flaking, no evidence of smoke or creosote in the wall cavity, appropriate draft, and clean combustion in the connected appliance. A liner in this condition does not need replacement regardless of age. Clay tile liners installed in the 1960s can remain serviceable 60+ years later if protected from thermal shock (no chimney fires) and freeze-thaw cycling (maintained crown and cap).
There are four liner material categories in common use. Each has different performance characteristics, different installation approaches, and different cost and lifespan profiles. When an operator recommends relining, they will specify the replacement material — understanding the differences is how you evaluate whether the recommendation makes sense.
Clay tile is the original chimney liner material used in masonry chimneys built from roughly 1900 through the 1980s. Rectangular or round tile sections, typically 12-24 inches tall, are mortared together inside the chimney as it is built. Clay tile is the cheapest liner over a full lifespan because it is essentially free as part of new masonry construction — it is only expensive to install as a retrofit (cast-in-place is usually chosen instead for retrofits).
Lifespan: 50-80+ years in protected conditions, shorter if exposed to thermal shock or freeze-thaw damage. Pros: Durable, chemically inert, compatible with all fuel types. Cons: Brittle, prone to cracking from chimney fires, joints can deteriorate, not retrofit-friendly. When recommended: Only in new construction. Not a realistic retrofit option in most cases.
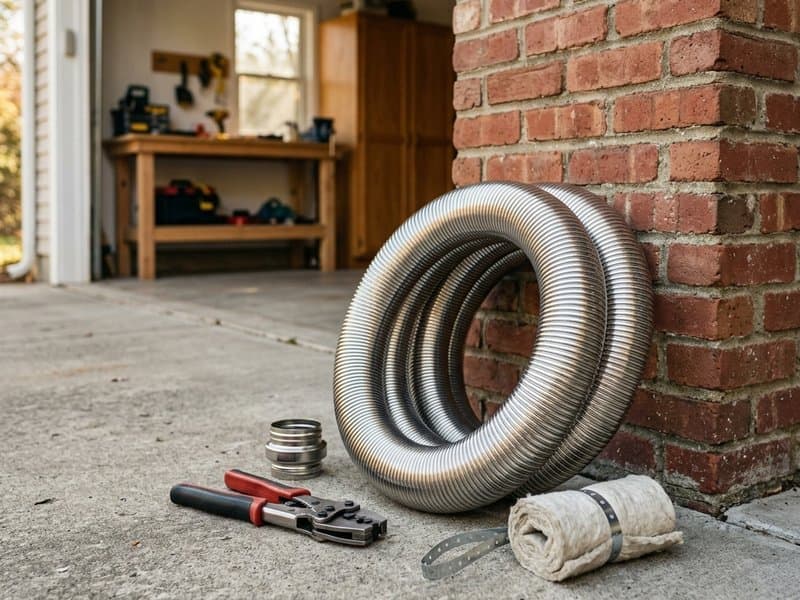
Stainless steel is the dominant retrofit liner material. A flexible or rigid stainless steel tube is inserted inside the existing masonry flue, either as a single full-length piece or as sections joined on-site. Insulated sleeves are wrapped around the tube before insertion to meet clearance-to-combustibles requirements.
Lifespan: 15-25 years for 304 stainless; 25-50+ years for 316Ti or heavier gauge in demanding applications. Pros: Fast installation (half-day to full-day), code-compliant for all fuel types, widely available, camera-inspectable. Cons: Shorter lifespan than clay, subject to acid corrosion in high-efficiency gas applications unless 316Ti grade. When recommended: After a chimney fire damages clay tile, on homes with no existing liner, on changes of fuel type (wood to gas), or as part of new wood stove installations. Cost: $1,500-$5,000 installed for standard single-flue 6-inch round.
Cast-in-place liners are applied by pumping a cementitious refractory mixture into the flue around an inflatable form. The form creates the flue void while the refractory cures around it, producing a continuous seamless liner. This is the most invasive and most expensive retrofit option.
Lifespan: 30-50+ years. Pros: Seamless, structural reinforcement of the surrounding masonry, excellent for irregular flue shapes. Cons: Expensive, requires specialised equipment and crew, longer installation (1-2 days), limited number of qualified installers. When recommended: Multi-flue historic chimneys, flues with irregular shapes that stainless cannot accommodate, structural reinforcement cases where the masonry itself is deteriorating. Cost: $3,500-$7,000 installed for single-flue standard application.
Aluminum liners are used exclusively for gas appliances, not wood-burning or solid-fuel. They are lighter, cheaper, and simpler to install than stainless, but the material is not rated for the temperatures of wood combustion and is not appropriate for any wood stove, wood-burning fireplace, or pellet stove.
Lifespan: 10-20 years depending on gas type and acid exposure. Pros: Inexpensive, light, easy retrofit for gas appliances. Cons: Not rated for wood or solid fuel, shorter lifespan than stainless. When recommended: Dedicated gas appliance venting in a chimney that previously served only gas. Cost: $800-$2,000 installed.
| Type | Lifespan | Cost (installed) | Fuel compatibility | Retrofit suitability |
|---|---|---|---|---|
| Clay tile | 50-80+ years | Included in masonry construction | All | Not practical |
| Stainless steel (304) | 15-25 years | $1,500-$4,000 | All | Excellent |
| Stainless steel (316Ti) | 25-50+ years | $2,500-$5,000 | All, incl. high-efficiency gas | Excellent |
| Cast-in-place | 30-50+ years | $3,500-$7,000 | All | Excellent for irregular flues |
| Aluminum | 10-20 years | $800-$2,000 | Gas only | Good for gas retrofits |
Relining is required under specific conditions. If your situation does not match one of these, relining may still be beneficial but it is not urgent — and "urgent" relining recommendations without matching conditions should be scrutinised.
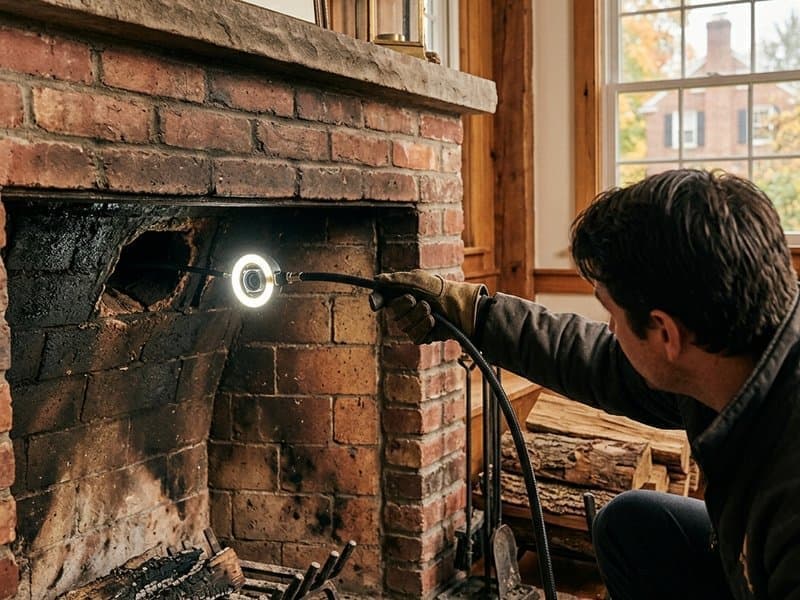
A Level 2 camera inspection shows cracked clay tile, separated joints, or spalled sections in the flue interior. The damage is visible on camera footage, not just verbally described. Cracks that allow combustion gases or heat to reach the surrounding masonry require liner replacement before the chimney can be safely used.
The key evidence: a video scan showing the specific defect. A relining recommendation without video evidence of the defect is not verifiable. Insist on camera footage before agreeing to the repair.
Some pre-1920 masonry chimneys were built with no internal liner — the flue is simply the interior surface of the surrounding brick. Modern fire code (NFPA 211 and the International Residential Code) requires a liner for all solid-fuel and gas appliance venting. If your chimney has no liner and you want to use a fireplace or wood stove, relining is required for safe operation and code compliance.
A Level 2 inspection with camera can confirm whether a liner is present. Unlined flues are typically recognisable by exposed brick on the interior flue surface. If an operator claims your flue is unlined, they should be able to show you the camera footage confirming this.
Adding a wood stove insert to a fireplace, converting from wood to gas, or changing from oil to gas all typically require a new liner sized for the new appliance. Modern high-efficiency gas appliances produce lower-temperature combustion gases with higher acid content, which degrades clay tile faster than wood combustion does — a clay-lined flue may need to be upgraded to stainless (316Ti grade) for gas use. Wood stove installations require an insulated stainless liner sized to the stove outlet.
This is one of the clearest legitimate triggers for relining. If you are installing a new appliance, expect the liner to be part of the installation scope.
A chimney fire generates temperatures of 1,500-2,000°F inside the flue, which thermally shocks clay tile liners. Clay tile may appear intact immediately after the fire but often develops hairline cracks that expand with subsequent use. NFPA 211 requires a Level 2 inspection after any chimney fire to assess liner condition, and if any damage is found, relining is the required response.
A homeowner whose chimney has had a documented fire should expect relining as a realistic outcome. A homeowner whose chimney has not had a fire but who is told relining is required "because of fire damage" should require camera evidence of the specific damage being claimed.
Persistent CO detection in rooms adjacent to the chimney, correlating with fireplace or appliance use, indicates flue gases are leaking into interior wall cavities. Liner damage is a common cause. This is a genuine emergency that requires immediate Level 2 inspection and, if the liner is the source, prompt relining.
The fact that relining is a legitimate repair means scammers use it routinely. Four patterns indicate relining is probably an upsell rather than a required repair.
Clay tile liners commonly develop minor surface crazing — fine surface cracks that do not penetrate the tile thickness — from normal thermal cycling. This is cosmetic, not structural, and does not require relining. A camera scan showing only fine surface crazing with intact joints and no through-tile cracking describes a serviceable liner.
An operator who recommends $4,000 relining based on surface crazing alone is upselling. The appropriate response is usually nothing — the liner is still doing its job. At most, a crown seal and a cap to reduce freeze-thaw damage may be worthwhile at $500-$1,000 combined.
A fake Level 2 inspection that produces no camera footage cannot legitimately identify liner damage. An operator recommending relining without showing you the specific defect on video is either genuinely incompetent or running the fake Level 2 scam. Either way, the recommendation cannot be evaluated and should not be acted on.
Require video evidence. A legitimate Level 2 inspector shows you the camera feed live, documents the findings with photo or video exports, and provides a written report with date-stamped images of every defect claimed.
A liner either has specific defects that require replacement or it does not. Language like "your liner is worn out," "the liner is outdated," "modern code requires a new liner," or "this needs updating" is not specific to any defect and is not a legitimate technical finding. Code does not require replacement of a serviceable existing liner. Age alone is not a defect.
Ask the operator to specifically name the defect driving the recommendation. If they cannot name one specific, localisable defect, the recommendation is not technical — it is a sales pitch.
This is the bait-and-switch applied to relining. The homeowner books a $99 sweep. On arrival, the operator declares the liner needs replacement for $3,500. The relining quote is the real service being sold — the cheap sweep is just the door-opener.
A legitimate operator does not typically sell major repairs from a first-visit routine sweep. Relining decisions should follow a properly scoped Level 2 inspection with documented findings, not a surprise recommendation from a sweep visit. If relining is raised during a sweep, schedule a separate Level 2 inspection (ideally from a different operator) before making any decision.
Because the liner install happens inside a space you cannot see, verifying the work is non-trivial. The most documented relining fraud case in the VoC research was confirmed by a second operator's camera scan showing no new liner had been installed. Four verification approaches protect against this.
Stay home during the install and ask to photograph the work. Legitimate installers do not object to the homeowner taking photos during the job. Photograph the liner material before it is inserted (so the brand and gauge are visible), the insertion process, and the completed top connection at the chimney crown.
A installer who refuses to allow photos, or who makes the work happen when you are not home, removes your ability to verify. This is not a normal request — it is a red flag.
The invoice should list the specific liner product installed — manufacturer name, model number, length, diameter, gauge, grade (304, 316Ti). If the invoice lists "stainless steel liner, $3,500" with no product detail, you have no evidence of what was actually installed. Require manufacturer and product model on the invoice before paying.
Match the product detail on the invoice against photos of the liner material before installation. If they do not match, you have evidence of fraud.
Book a Level 2 camera inspection from a different operator 60-90 days after the install. The second operator's camera footage either confirms the new liner is in place (smooth stainless surface with visible joints or seamless continuous surface) or exposes that no liner was installed (original clay tile still visible, or no liner material at all).
The 60-90 day window is intentional. It is long enough that the second operator is not visiting immediately after the work (which the original operator might anticipate) but short enough that any documentation gathered can still support a small-claims filing within most state deadlines.
A newly installed properly-sized liner typically improves appliance draft and reduces creosote accumulation. If the appliance performance does not change at all after what was supposedly a major relining project, that is a soft signal worth investigating with an independent camera scan.
Five questions to ask any operator recommending relining. Note the answers — they document either a legitimate recommendation or a sales pitch.
Short answer: usually not. DIY stainless steel liner kits are available at retail for $400-$1,500, and the installation is technically possible for a homeowner with rooftop access and confidence with installation instructions. But the kits are rarely the right economic choice once real factors are considered.
Insurance and code compliance. Most home insurance policies require professional installation for any solid-fuel appliance venting. A DIY liner install voids coverage for any chimney fire originating in a DIY-installed liner. Most local jurisdictions require installation by a licensed professional for code compliance; inspection at time of sale may require professional installation records.
Manufacturer warranty. Liner warranties typically require professional installation to activate. A DIY install voids the manufacturer material warranty, leaving you with the cost of replacement if the liner fails.
Rooftop safety. Liner installation requires extended work at the chimney top — removing the cap, inserting the liner from above, connecting at the crown. Homeowners who are not practiced at rooftop work are at real fall risk.
Sizing and selection errors. The right liner diameter, insulation wrap, and top termination hardware depend on the specific appliance and flue. DIY kits tend to ship as generic 6-inch round configurations. Appliance mismatch can produce draft problems, excessive creosote accumulation, or code violations.
The situation where a DIY liner kit can make sense: a capable homeowner with rooftop experience, a simple single-flue installation, documented insurance and code compliance on DIY installs in their jurisdiction, and willingness to accept the warranty and liability trade-offs. For most homeowners, a professional install at $1,500-$3,500 is the right choice even though the DIY kit is cheaper by materials.
Browse 29+ guides, or jump straight to verified operators in your state.
The 7 chimney sweep scam patterns documented across 27 consumer sources — bait-and-switch, fake Level 2, multi-alias SEO, unnecessary relining. How to spot each one.
Level 1, 2, and 3 chimney inspection per NFPA 211 — what each includes, when it's required, cost ranges, and how scammers exploit the Level 2 designation.
Chimney repair cost varies from $700 to $20,000 for the same job. Why quotes spread 10x, how to evaluate them apples-to-apples, and when a high quote is justified.