Cost Estimator
See what verified chimney sweeps charge in your area for each service.
The chimney cap is the single cheapest piece of chimney hardware that does the most to prevent expensive repairs later. A $150 stainless steel cap that lasts 20 years prevents thousands of dollars in water damage, animal intrusions, and spark-related fires. It is also one of the simplest components to understand. Routine cap installations on a single-flue, accessible roof typically run $200–$400 installed; quotes well above that range may reflect different materials, custom multi-flue work, or difficult access — ask the operator to itemize the materials, labor, and any access surcharge driving the price.
This guide is the consumer reference for chimney caps. It covers what a cap does, the five common cap types with real cost ranges, how to tell if you need a new one, and how to spot the cap-installation upsell before you sign for it. If your operator has quoted a cap replacement above $500 for a single-flue standard chimney, read this first.
A chimney cap is a covering — typically metal with mesh sides — mounted over the top of the flue opening. It serves four functions simultaneously, any one of which would justify the hardware on its own.
Rain protection. An uncapped flue is an open drain. Rainwater falls directly into the flue, dissolves creosote into acid, and erodes the liner and the smoke chamber from the inside. A cap blocks direct rainfall while allowing combustion gases to exit.
Animal prevention. Squirrels, birds, raccoons, and bats consider an uncapped flue to be an ideal cavity. Wire mesh on the sides of the cap stops them. Blocked flues from animal nesting are a major cause of carbon monoxide incidents in older homes — the cap is the simplest defense.
Spark arrest. Mesh acts as a spark arrestor, catching burning embers before they can land on the roof or surrounding vegetation. This function is code-required in many Western states with wildfire exposure, particularly California, Oregon, and parts of Colorado and Arizona.
Downdraft reduction. The cap's top plate disrupts wind that would otherwise blow directly into the flue, reducing cold-air downdrafts and smoke-back events.
One piece of hardware, four jobs. For $150-$300 installed on a single-flue chimney, the cost-benefit math is not close.
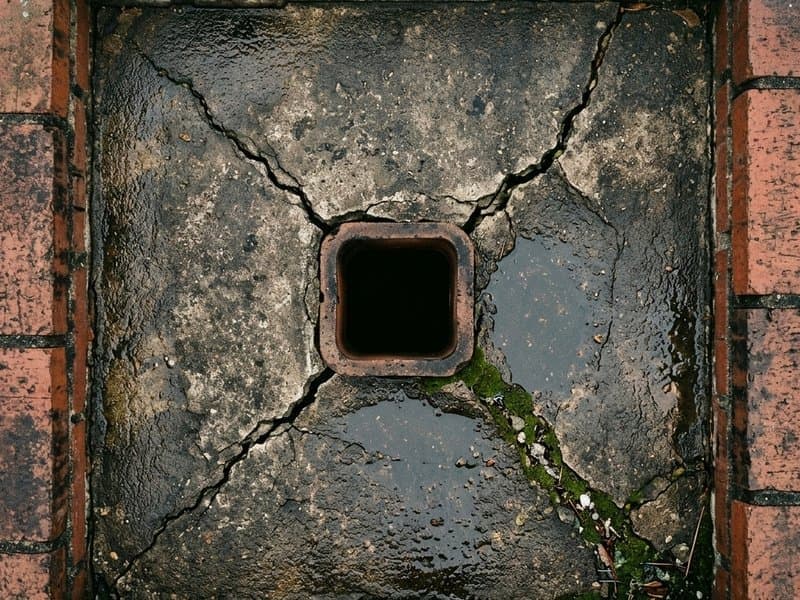
You need a new cap when visible degradation of the existing one is affecting any of its four functions. The signs are observable from the ground with binoculars or from the roof with a ladder — no special tools required.
If any of these are present, a cap inspection and likely replacement is the next step. None of them requires an expensive diagnosis first.
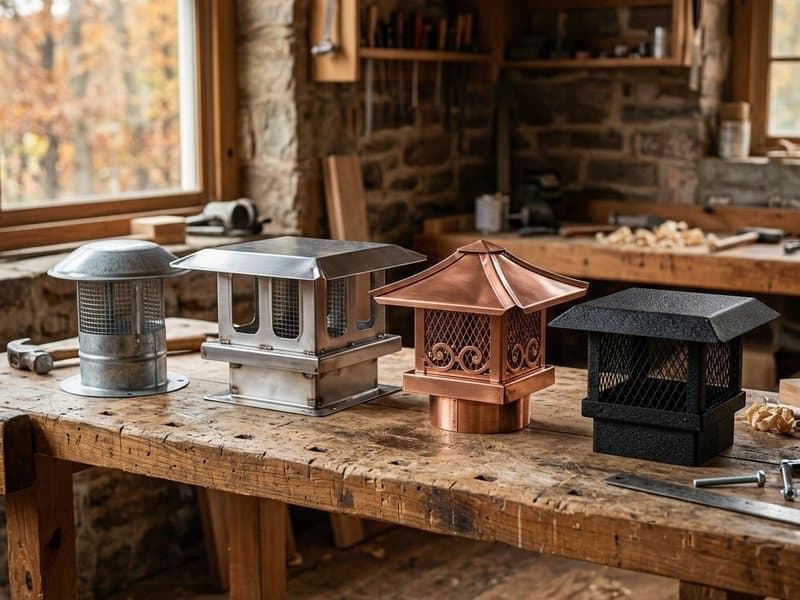
Five cap types cover nearly all residential installations. Choose by flue count, budget, and expected service life.
| Type | Material | Cost (materials) | Cost (installed) | Lifespan | Best For |
|---|---|---|---|---|---|
| Galvanized steel | Galvanized carbon steel | $40-$120 | $150-$300 | 5-10 years | Budget replacement, short-term |
| Stainless steel | 304 or 430 stainless | $80-$250 | $200-$450 | 15-20+ years | Best overall value, most homes |
| Copper | Solid copper | $250-$700 | $450-$1,100 | Lifetime | Historic, high-end, aesthetics |
| Multi-flue | Stainless or copper, custom-sized | $200-$600 | $400-$900 | 15-20+ years (stainless) | Chimneys with 2+ flues in one mass |
| Top-mounted damper cap | Stainless + silicone seal | $250-$500 | $400-$700 | 10-15 years (gasket) | Replaces failing damper AND cap |
Galvanized steel caps are the cheapest option at retail and the most common original-equipment caps on mid-range construction. They work, but the galvanization wears off in coastal, humid, or freeze-thaw environments within 5-10 years, after which the underlying steel rusts through. Manufacturer warranty on galvanized caps is typically only 3 years — a useful tell about how the manufacturers themselves rate the material's service life. Choose galvanized only if budget is tight and you expect to replace again in a decade. The lifetime cost of two galvanized caps usually exceeds the cost of one stainless.
Stainless steel is the default recommendation for most homes. A stainless cap installed properly lasts 15-20+ years in most climates, resists rust in coastal and road-salt environments, and reputable manufacturers (HY-C, Copperfield, Olympia Chimney) typically back stainless caps with a lifetime warranty — versus the 3-year warranty on galvanized. The upfront cost difference (often $50-$100) pays for itself in longevity multiple times over. Total installed cost typically runs $200-$450 for a single-flue standard chimney — cheap for what it does.
Stainless steel grades — what to ask: Common consumer-grade caps are made from 304 or 430 stainless. Professional-grade caps are often 316 stainless, which is significantly more corrosion-resistant — particularly important in coastal, high-salt, or high-moisture environments. If you're being quoted a premium price for a "stainless" cap, ask the operator which grade is being installed. The difference between 430 and 316 is real, and 316 is the right call near the ocean or in heavy freeze-thaw climates.
Copper caps cost 2-4x stainless but last effectively forever. The initial patina turns the cap green within 5-15 years, which many homeowners consider a feature. Copper is the right choice for heritage homes where period-appropriate materials matter, for high-visibility chimneys where the cap is a visual element, and for owners who want a lifetime install. For utility use on a hidden chimney, copper is usually overkill.
Older masonry chimneys frequently have 2, 3, or 4 separate flues in one brick mass. A multi-flue cap is a single large structure that covers all of them at once — essentially a stainless or copper shroud mounted on the crown. Installed cost runs $400-$900 depending on flue count and material.
There are three common multi-flue configurations, and the choice between them is more consequential than most homeowners realise:
Why individual caps are usually the wrong choice. When two flues are close together (typical on older chimneys), the lid of one cap acts as a small roof — and rainwater running off that lid pours directly onto the adjacent flue's opening. The amount of water this funnels into the wrong flue can easily exceed 35 gallons per year. That water hits the smoke chamber and liner of the flue it was never supposed to enter, accelerating creosote acidification and masonry damage.
A single crown-mounted or outside-mounted multi-flue cap eliminates the cross-flue water transfer entirely. Unless your flues are spaced far apart (12+ inches edge-to-edge), the multi-flue cap is the correct call even if individual caps appear cheaper on the quote.
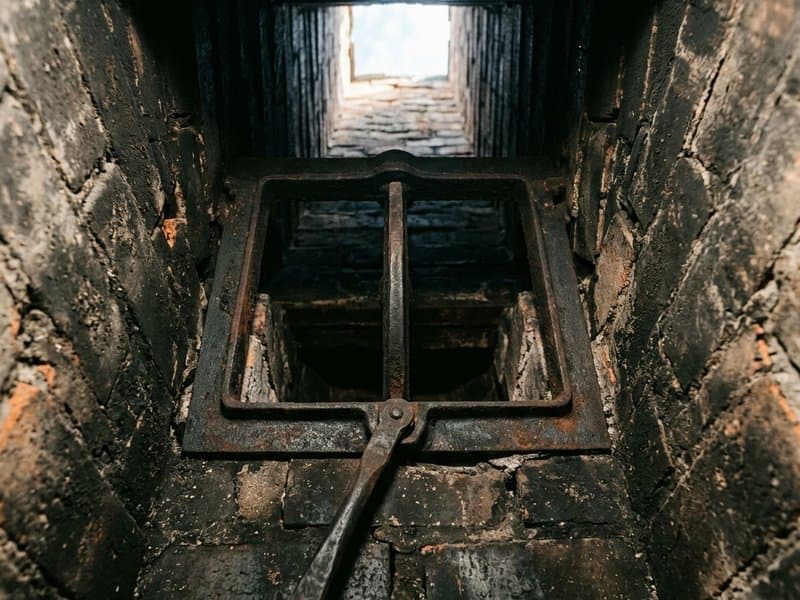
A top-mounted damper cap combines the cap function with a cable-operated damper at the chimney top. It replaces both the existing cap and the original throat damper. For chimneys where the throat damper is failing anyway — rusted, warped, won't seal — a top-mounted damper cap is often the cheapest full-system fix at $400-$700 installed. See chimney-damper-guide for when this makes sense.
Chimney cap installation is one of the few chimney jobs where DIY is sometimes the right call — but only in specific conditions.
A single-flue standard stainless cap on a low-slope roof with safe access is a 30-60 minute job. Required: a ladder rated for the roof pitch, basic measuring ability, a cordless drill with masonry or metal bits depending on mount type, and comfort working at height. The cap ships with installation hardware and instructions sufficient for a first-time installer.
Four situations make DIY the wrong choice:
Professional cap installation on a standard single-flue chimney:
If your operator has quoted above these ranges for a standard install with no unusual access difficulty, ask why. The most common single-flue stainless install typically runs $200–$400 total; quotes well above that range often reflect different materials, custom-fit work, or access challenges — get a written breakdown.
The pricing ranges above assume standard ground-to-chimney ladder access on a single-story or low-slope chimney. That assumption is only valid for a portion of real-world installs — and it is the single biggest reason cap quotes for the same hardware can land hundreds of dollars apart.
Standard single-flue cap installation on a ground-accessible chimney with direct ladder access typically runs $200–$400 total. OSHA fall-protection requirements kick in much earlier than most homeowners assume: any roof pitch greater than 18 degrees (4/12) triggers them, as does any work performed above 8 feet of working height. Above those thresholds, fall protection is no longer optional — it is legally required for any contractor working on the roof, and it is required precisely because no homeowner wants their chimney professional injured on the job.
Depending on the chimney's height, the roof pitch, and the accessibility of the chimney top, a legitimate operator may need to deploy:
Once any of this access equipment is required, a cap installation can legitimately run $600–$1,200+, and the higher number is not markup — it reflects real safety costs the operator absorbs whether you see them itemised or not.
The key question for homeowners is not "why is this quote higher than the article said?" — it is "does this quote include safety access equipment, and does the chimney actually need it?" If the chimney is under 30 feet with standard ladder access and the quote exceeds $500, ask the operator what is included beyond the cap and basic installation. If the chimney is taller, on a steep pitch, or otherwise hard to access, expect the higher range and ask the operator to confirm that fall protection is included in the price.
A quote that comes in at $250 for a 40-foot, three-story chimney is the more concerning number — that price is unlikely to include OSHA-compliant access, which means corners are being cut on safety somewhere in the job.
Cap quotes are a common upsell target because the work is simple and the markup is easy to hide. Three patterns are worth understanding.
A routine single-flue stainless cap installation on an accessible roof typically runs $200–$400 total. If a quote significantly exceeds that range — with no access difficulties, no code upgrade requirement, and no multi-flue geometry — ask for a written breakdown of materials and labor, and get a second quote to compare scope.
Counter-response: Ask the operator to break the quote into materials (product name and price) and labor (hours estimated and rate). A stainless cap that retails for $150 cannot justify a $450 installed surcharge on a routine install.
The operator diagnoses a bad cap and bundles a mandatory crown repair, damper replacement, or other additional line item into the quote. Sometimes the bundle is real — a chimney with a missing cap often has collateral water damage — but "mandatory" is the red flag. A legitimate operator separates recommended additional repairs from required ones and offers the cap-only quote as one option.
Counter-response: Request a cap-only quote with the other items as separate line items you can evaluate independently.
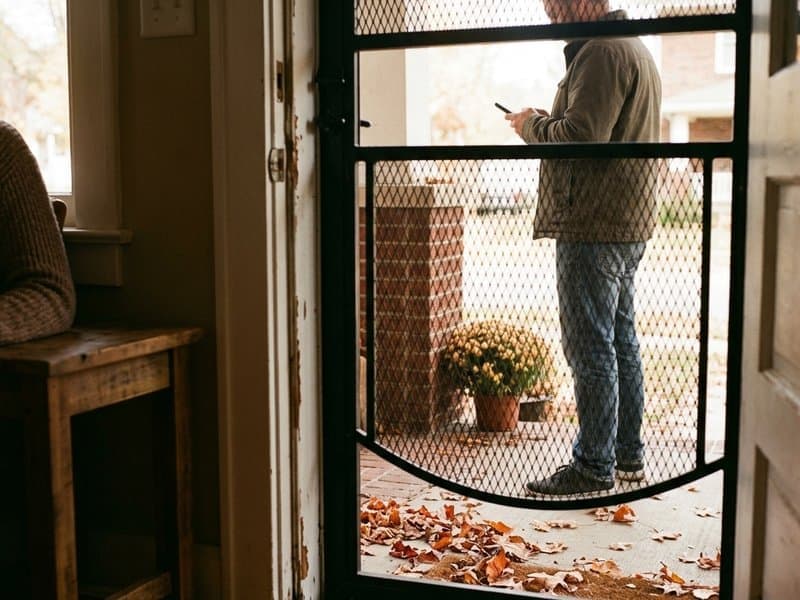
A $99 sweep visit concludes with a finding that the cap needs replacement for $450. This is not necessarily a scam — caps do fail and sometimes need replacement — but the diagnostic-and-install-in-one-visit pattern is how bait-and-switch pricing works. An honest sweep flags the cap issue, provides a quote for your review, and schedules the work as a separate visit if you agree.
Counter-response: Thank the operator for the finding, take the quote for review, and get a second quote before approving. If the two quotes are close, that's confirmation of scope; if they differ significantly, ask each operator to walk through what's included.
See seven-chimney-sweep-scam-patterns for the full framework of chimney scam patterns.
Getting the right cap size is the one thing you have to do correctly yourself if you are ordering DIY. Three measurements matter — most online checklists list only two and miss the one that actually drives draft and code compliance.
1. Flue tile outside dimensions. For clay tile flues (most masonry chimneys), measure the outside dimensions of the top tile — usually rectangular (8x8, 8x12, 12x12, 13x13 inches are common). The cap mounts to the outside of the tile, so you need outside dimensions, not inside.
2. Flue tile height above the crown. The top tile typically protrudes 2-4 inches above the crown. Measure this height — caps have a standard mounting depth that needs to accommodate your tile extension.
3. Clearance from the flue tile to the cap lid. This is the vertical distance between the top of the flue tile and the underside of the cap lid (the "roof" of the cap). Code requires this clearance to allow combustion gases to exit unrestricted; too little clearance creates draft problems and can cause smoke spillage back into the room. This is the measurement most consumer guides skip — and the one that most often sends a wrong-sized cap back to the manufacturer.
For stainless steel liners or round metal flues, measure the outside diameter of the flue pipe. Standard caps come in 3-inch, 4-inch, 6-inch, 8-inch, and 10-inch diameters.
If you are uncertain, photograph the chimney top from the roof with a ruler in the frame and email the photos to the cap manufacturer. Every major manufacturer (HY-C, Olympia, Draft King, ICC) has customer service that will spec the right cap from photos.
Consumers regularly confuse chimney caps with chase covers. They are different hardware for different chimney types — and on factory-built (prefab) systems, both components exist and serve different functions.
Chimney cap: A small cover over the flue opening. On masonry chimneys it mounts to the top tile or to the crown. On factory-built (prefab) chimneys, the cap is a listed component of the chimney system — meaning it must meet the chimney manufacturer's specifications to keep the system's UL listing intact. Using a non-listed cap on a factory-built chimney can void the listing and create a fire hazard.
Chase cover: A large sheet-metal cover over the entire top of a factory-built prefab metal chimney chase. Covers the whole chimney top, not just the flue. Typically 2-4 feet square. The chase cover is the outer cover — the chimney cap (the smaller component on top of the flue itself) sits on top of the chase cover.
If your chimney is a framed wood chase with metal siding and a sheet-metal top, you have a chase cover. The flue still has its own cap on top of that chase cover. Chase covers fail more often than chimney caps because they are large flat sheet-metal surfaces exposed to weather, snow load, and thermal cycling. Replacement chase covers cost $400-$1,500 installed depending on size and material.
Confirm what the operator is actually replacing. When a quote says "cap replacement" on a prefab chimney, ask the operator to clarify whether they mean:
A quote that uses "cap" terminology on a prefab chimney without specifying which component is being replaced is either confused or deliberately understating scope. The price difference between the two is significant, and on factory-built systems, using a non-listed replacement cap voids the chimney's UL listing and creates a fire-safety problem the homeowner may not discover until insurance denies a claim.
Annual visual inspection is the full maintenance schedule for most caps. The five-minute check:
If all five pass, the cap is fine for another year. If any fail, schedule a closer inspection from the roof.
For stainless and copper caps, there is no routine maintenance beyond the annual visual. For galvanized caps, watch for first rust spots around years 5-7 — once visible, plan replacement within 12-24 months before mesh integrity is compromised.
Cap and crown repairs are often scheduled together because both require rooftop access and both are visible during the same inspection. If the crown needs attention, replacing the cap at the same visit typically costs $100-$200 less than two separate service trips. See chimney-crown-repair for crown repair details.
Technical review by John Zeron, Master Chimney Sweep, Master Hearth Professional — Closer to the Hearth Chimney Specialists
Browse 30+ guides, or jump straight to verified operators in your state.
Chimney damper types, costs $100-$600, throat vs top-sealing comparison, and the damper repair upsell for problems that need cleaning not replacement.
The 7 chimney sweep scam patterns — bait-and-switch deep clean upsell vs legitimate chemical treatment, fake Level 2, multi-alias SEO, unnecessary relining.
Chimney crown repair cost $150-$2,000. Crown vs cap vs chase cover, severity-based repair options, and the $2,000 rebuild upsell for $200 hairline cracks.