Did My Sweep Do the Work?
Post-service checklist to verify the work was actually performed.

A chimney liner is the single most important safety component in your chimney system. It is the surface that contains combustion gases, resists heat transfer to the surrounding masonry and framing, and preserves the flue geometry that produces proper draft. An unlined chimney is a code violation in nearly every US jurisdiction and a direct carbon monoxide risk. A liner of the wrong material — especially 304 stainless steel installed for wood-burning use when 316Ti was required — reduces lifespan by 40-60% while letting the operator pocket the material savings.
This guide is the comprehensive technical reference for chimney liners. It covers what a liner does, the five material types with real cost-per-linear-foot and installed-total ranges, the difference between 304 and 316Ti stainless (the single most important grade distinction in the industry), the installation process, and the warning signs of liner failure. For the shorter consumer-focused article on "when you actually need relining vs when you're being upsold," see relining-guide.
A chimney liner performs three essential functions that, together, determine whether the chimney is safe to use with any fuel-burning appliance.
Combustion produces carbon monoxide, carbon dioxide, water vapor, and other gases at temperatures that can reach 1,800°F during active burning. The liner contains these gases within a smooth sealed channel that exits above the roof. A damaged or absent liner permits gases to leak into wall cavities, attic spaces, and living areas. Carbon monoxide detection in rooms adjacent to a chimney is one of the most common indicators of liner failure.
Chimney masonry has clearance-to-combustibles requirements — the code mandates minimum distances between hot surfaces and wood framing. The liner is what makes those distances work. Without a liner, flue gas temperatures transfer directly to the surrounding masonry, which in turn transfers heat to adjacent framing. Over decades of use, this accelerates masonry deterioration and creates fire risk.
Modern high-efficiency gas appliances introduce a second threat: acid condensation. Flue gases from 90%+ efficiency condensing appliances are cool enough to produce liquid water that mixes with sulfur compounds to form acid. Acid attacks clay tile and 304 stainless steel. A mismatched liner material on a high-efficiency gas install is a documented failure mode with a 5-10 year life.
The liner's internal diameter determines how the appliance drafts. An oversized flue — a big masonry chimney serving a small modern wood stove — produces cool sluggish flue gases, excessive creosote formation, and poor combustion. A liner sized to the appliance restores proper draft. This is why adding a wood stove insert or converting fuel type nearly always requires a new liner: the original flue size is wrong for the new appliance.
Five materials cover virtually all residential chimney liners in use today. Understanding which applies to your situation — and which the operator is quoting — is the core technical decision.
Clay tile is the original liner material used in masonry chimneys built from roughly 1900 through the 1980s. Rectangular or round clay sections, typically 12-24 inches tall, are mortared together inside the chimney during construction. Clay is effectively free as part of new masonry because it is installed during the original build — the cost shows up only on retrofits, where it is almost never chosen.
If your chimney has an intact clay tile liner, the best choice is usually to preserve and maintain it rather than replace. Clay liners that have not been thermally shocked or exposed to chronic moisture regularly outlast their original construction date by decades.
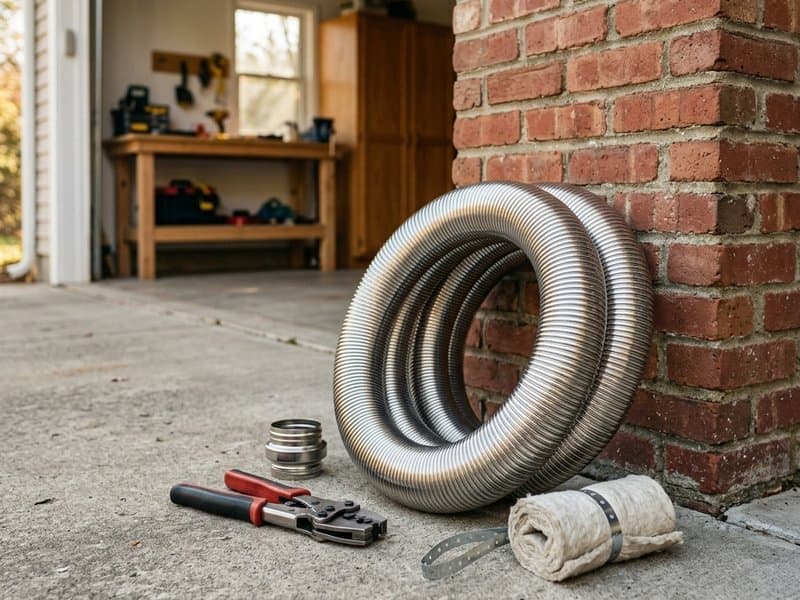
Stainless steel is the dominant retrofit liner material in the US market. A stainless tube — either flexible corrugated or rigid welded — is inserted inside the existing masonry flue from above, insulated with a wrap if the application requires it, and terminated at the crown and the connected appliance.
This is the single most important material decision in the chimney liner industry, and it is the distinction scam operators exploit most frequently. Both are "stainless steel." They perform very differently in real use.
304 stainless is the budget grade. It resists mild corrosion and handles temperatures up to 1,600°F. It is appropriate for oil-burning appliances and standard-efficiency gas (older gas appliances below 80% efficiency). It is NOT rated for wood burning, coal, or high-efficiency condensing gas (90%+ efficiency).
316Ti stainless is the full-service grade. It handles temperatures above 2,000°F, resists acid corrosion from condensing combustion gases, and carries lifetime warranties from major manufacturers (ICC Excel, Olympia, Copperfield). It is required for wood-burning installations, coal installations, and high-efficiency gas.
The scam: an operator quotes "stainless steel liner" without specifying grade. They install 304 and charge as if they installed 316Ti (a $300-$800 material savings on a typical install). For a wood-burning application, the 304 liner begins acid-etching within months and fails in 5-10 years instead of 25-50. By the time the failure is detected, the statute of limitations on the installation may have run.
Before signing any stainless steel liner quote, require the written quote to specify: grade (304 or 316Ti), thickness (gauge), manufacturer name and model number. Match these against the invoice after install. If the operator will not commit to 316Ti in writing for a wood-burning application, hire a different operator.
Aluminum is the budget material for gas-only applications. It is light, cheap, and simple to install, but it is NOT rated for any solid-fuel appliance — not wood, not pellet, not coal.
An aluminum liner installed for a wood stove is malpractice. An aluminum liner installed for a high-efficiency condensing gas appliance is incorrectly specified. For dedicated standard-efficiency gas venting where budget matters, aluminum is a legitimate choice.
Cast-in-place liners are applied by pumping a cementitious refractory mixture into the flue around an inflatable form. The form creates the flue void; the refractory cures around it. The result is a seamless continuous liner bonded to the surrounding masonry.
Cast-in-place is the right choice for multi-flue historic chimneys, flues with irregular shapes that stainless cannot accommodate, and cases where the surrounding masonry itself needs structural reinforcement. It is rarely the right choice for straightforward retrofits where stainless will work.
Thermocrete, HeatShield, and similar products are sprayed refractory coatings applied to repair a damaged existing liner rather than replace it. The product is pumped onto the liner interior, smoothed, and cured in place. It restores sealed integrity without removing the original liner.
Sprayed repair coatings are the right middle option when a clay tile liner has minor damage that does not justify full replacement. They are overquoted when the existing liner is already too damaged to serve as a substrate — in those cases, full replacement is required and the spray repair will fail prematurely.
| Type | Cost per ft | Cost installed | Lifespan | Fuel compatibility |
|---|---|---|---|---|
| Clay tile (retrofit) | $10-$25 | Not typical retrofit | 50-80+ yrs | All |
| Aluminum | $20-$40 | $800-$2,000 | 5-15 yrs | Gas only |
| Stainless 304 | $30-$50 | $1,500-$3,500 | 15-25 yrs | Oil, standard gas |
| Stainless 316Ti | $40-$60 | $2,500-$5,000 | 25-50+ yrs | All |
| Cast-in-place | $50-$100 | $3,500-$7,000 | 30-50+ yrs | All |
| Thermocrete / HeatShield (repair) | N/A (sprayed) | $2,000-$4,000 | 10-20 yrs | All (per product rating) |
Liner insulation is an insulated wrap or fill that surrounds the stainless steel liner inside the masonry flue. It is a real technical component that affects performance and safety, and it is required for some applications — but it is also a common upsell on installs where it is not needed.
Wood-burning applications require insulation per NFPA 211 when the chimney does not meet clearance-to-combustibles requirements on its own. In practice, this applies to nearly every retrofit wood stove install — the original masonry chimney was sized for a different appliance, and the new insulated liner provides the clearance safety margin the install requires.
High-efficiency condensing gas installations require insulation to prevent acid condensation inside the flue — keeping flue gas temperatures above the dew point reduces acid formation.
Standard-efficiency gas appliances typically do not require insulation. Oil appliances in chimneys with intact clay tile liners typically do not require insulation. Retrofit stainless liners in chimneys that already meet clearance-to-combustibles typically do not require insulation.
Insulation wrap or pour-in vermiculite typically adds $300-$800 to a stainless steel reline job. For a 25-foot wood stove install, budget $500-$700 for insulation as part of the total.
An operator who includes $800-$1,500 for insulation on a standard gas reline is inflating scope. Ask specifically which code section or manufacturer spec requires insulation for your application. If the operator cannot cite one, the insulation is optional and the price should be a budget-tier $300 addition, not a premium line item.
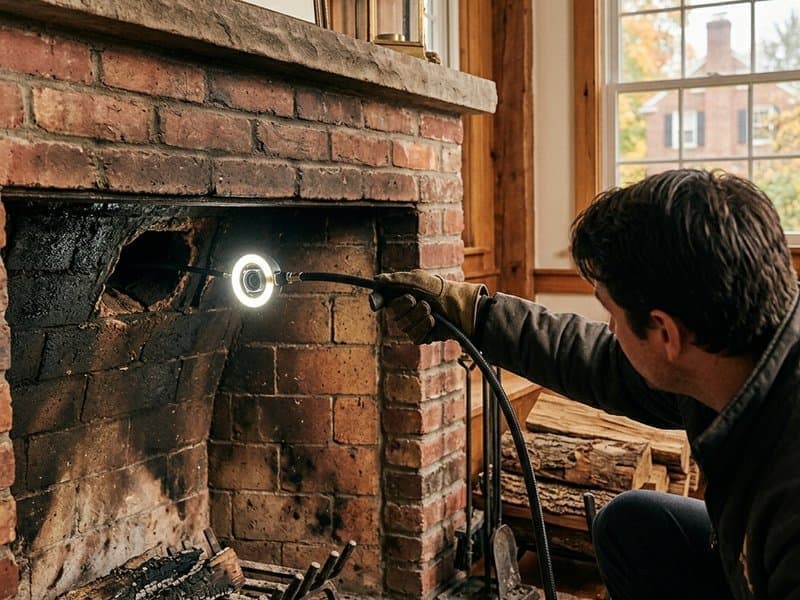
Understanding what a real reline install looks like helps you verify the work was completed. Standard stainless steel liner install on a single-flue masonry chimney:
The installer inspects the chimney with a video camera from both top and bottom, measures the total flue length and any bends or offsets, and confirms the correct liner diameter and length for the appliance. Duration: 30-60 minutes.
The existing cap is removed. If the clay tile liner is severely damaged, loose tile sections are removed. The flue is cleaned of debris and creosote. Duration: 30-60 minutes.
The new stainless liner is inserted from the top down. Flexible liners are fed straight down; rigid sections are joined on-site. Insulation wrap is typically applied to the liner before insertion. Duration: 45-90 minutes for a straight-run single flue; longer for offsets or bends.
The bottom of the liner is connected to the appliance flue outlet (for stoves and inserts) or terminated at the smoke chamber (for open fireplaces). Appliance-side connections include specialised fittings that should be listed on the installation invoice. Duration: 30-60 minutes.
The top of the liner is secured to the chimney crown with a top plate and mounting hardware, then a new cap is installed. The top plate seals the gap between the liner and the surrounding masonry. Duration: 30-45 minutes.
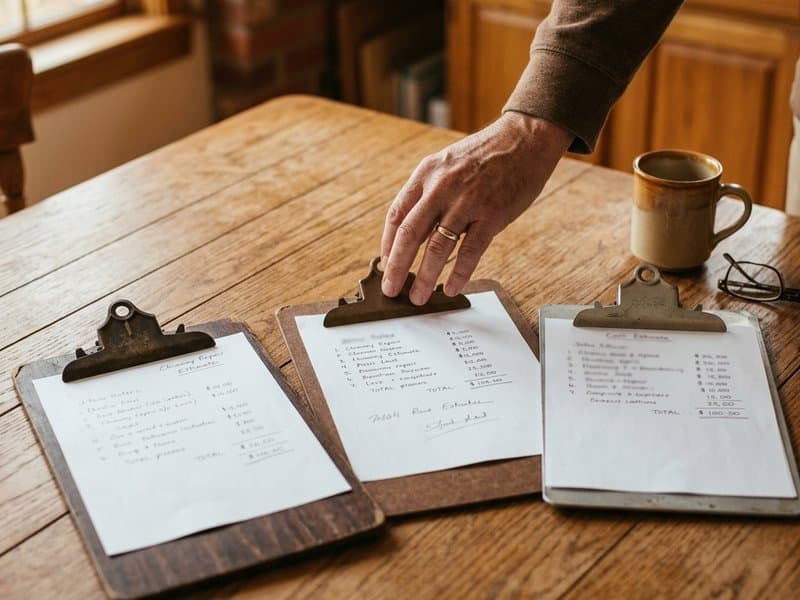
The installer provides: a written invoice listing specific products (manufacturer, model, diameter, length, gauge, grade), before-and-after photos or video, a material warranty certificate, and a workmanship warranty statement. Total install duration: 3-6 hours for standard single-flue, 1-2 days for complex multi-flue or cast-in-place.
An install that takes under two hours has likely skipped required scope. An install where no documentation is provided is a documentation failure that will hurt you if you later need to prove the liner was installed.
Most US jurisdictions require a chimney liner for all fuel-burning appliance venting. The baseline requirements under NFPA 211 and the International Residential Code:
Local code variations exist. Some jurisdictions require additional permit and inspection steps; some have additional spark arrestor or termination height requirements. Ask your operator to cite the specific code section that applies to your install if there is any question.
Five observable signs that the existing liner is failing. Any one of them justifies a Level 2 camera inspection.
See inspection-levels for when a Level 2 camera inspection is required under NFPA 211, and verify-work for how to verify the post-install condition of a newly installed liner.
Browse 30+ guides, or jump straight to verified operators in your state.
Chimney relining cost $1,500-$5,000. When you actually need a new liner, when it's an upsell, and how to verify the liner was installed — per NFPA 211 standards.
NFPA 211 inspection levels: Level 1 no camera, Level 2 video camera required. Each level includes all lower levels. Sweep durations, scope, scams to avoid.
Chimney repair cost varies from $700 to $20,000 for the same job. Why quotes spread 10x, how to evaluate them apples-to-apples, and when a high quote is justified.