Creosote Risk Calculator
Estimate creosote buildup (Grade 1/2/3) based on fuel, usage, and time.
Creosote is the condensed residue of incomplete wood combustion — a tar-like substance that coats the interior of chimney flues and is the direct cause of nearly every residential chimney fire in the United States. Per US Fire Administration data, approximately 22,000 residential chimney fires occur annually in the US, the overwhelming majority traceable to creosote ignition. The encouraging part: creosote is preventable at the point of combustion and removable at the point of accumulation. The key is understanding the three stages of creosote and matching the right response to the stage you actually have.
This guide is the consumer reference for creosote. It covers what creosote is, the three stages (flaky, crunchy, glazed), the specific fire risk of each, what causes excessive accumulation, how to remove creosote at each stage, and the real cost ranges for each removal method. If you heat with wood or a pellet stove and have not had a sweep in more than 12 months, this is the first article to read.
Creosote is a byproduct of wood combustion that forms when incompletely-burned hydrocarbons condense on cooler flue surfaces as they move up the chimney. Wood that does not fully combust releases volatile compounds — tars, oils, and hydrocarbons — as smoke. When these compounds contact flue surfaces that are below their condensation temperature, they deposit as a coating that hardens into creosote.
The condensation happens at the flue surface, not in the fire itself. This is why creosote accumulates thickest at the top of the chimney (where flue gases have cooled most) and why exterior-wall chimneys accumulate creosote faster than interior-wall chimneys (exterior walls run cooler). It is also why oversized flues — big masonry chimneys serving small modern wood stoves — accumulate creosote faster than properly-sized flues: the cooler walls condense more vapor.
Creosote is highly flammable. Once ignited, it burns at temperatures of 1,500-2,000°F inside the flue — hot enough to crack clay tile liners, damage stainless steel, and transfer enough heat to the surrounding masonry and framing to ignite structural members. This is the mechanism of chimney fires. Prevention is the first defense; annual removal is the second.
Creosote accumulates in three progressive stages, each with distinct appearance, removal difficulty, and fire risk. Understanding which stage your flue has determines the appropriate response.
The earliest stage. Light, flaky, dusty deposits that look like black soot or ash. The texture is crumbly and the deposits dislodge easily when brushed. This is the normal output of any wood fire and accumulates at a predictable rate based on usage and burning practices.
Stage 1 creosote is not a crisis. Every wood-burning flue produces it, and annual maintenance removes it before it progresses. If your chimney is being swept annually and you burn reasonably well, Stage 1 is all you will ever accumulate.
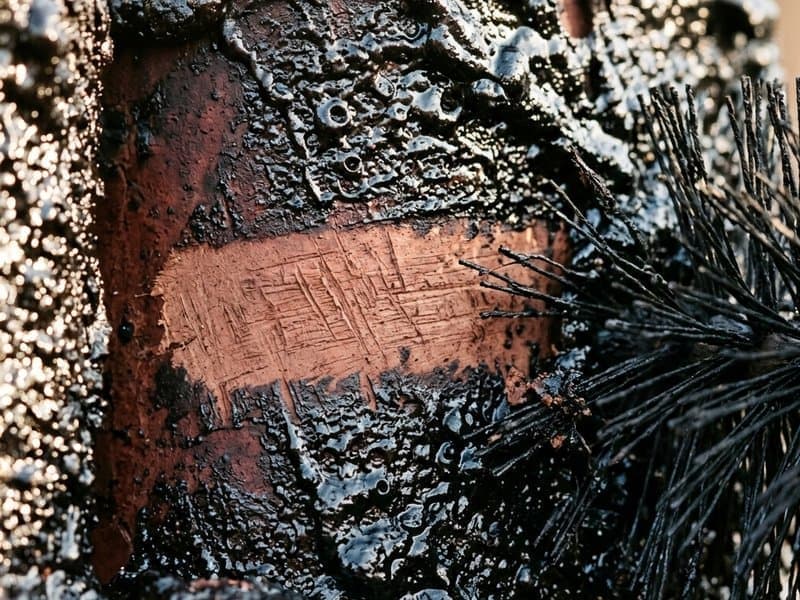
The intermediate stage. Shiny, hardened flakes that look like peanut brittle or hardened tar. The texture is crunchy rather than dusty — the deposits have begun condensing and hardening. Brush sweeping alone often cannot remove Stage 2 completely; mechanical tools or chemical treatments are typically required.
Stage 2 indicates that accumulation has been allowed to progress beyond normal annual maintenance. Either the flue has not been swept in more than one burning season, or burning practices are producing more creosote than a single year of operation should generate. See the "what causes excessive creosote" section below.
The advanced stage. Thick, shiny, tar-like coating that resembles spilled hardened black lacquer. The deposit is bonded to the flue surface and does not fracture or flake off when brushed. Glazed creosote is extremely difficult to remove and represents the highest fire risk of any flue condition.
Stage 3 is a serious condition. It indicates chronic neglect of chimney maintenance, extreme burning practices (smoldering fires, unseasoned wood for multiple years), or both. Stop using the fireplace until a professional evaluates and treats the glaze — continued burning with Stage 3 creosote is a genuine fire hazard.
| Stage | Appearance | Removal Difficulty | Fire Risk | Removal Cost |
|---|---|---|---|---|
| Stage 1 (flaky) | Light, dusty, easily-brushed | Low — standard sweep | Low under 1/8 inch | $150-$300 (standard sweep) |
| Stage 2 (crunchy) | Shiny flakes, peanut-brittle texture | Medium — chemical + rotary | Moderate | $200-$400 |
| Stage 3 (glazed) | Thick shiny coating, bonded | High — glazeaway treatment | Very high | $300-$600+ per treatment |
Creosote accumulates in every wood-burning flue. Excessive accumulation — enough to produce Stage 2 or Stage 3 within a single burning season — has five specific causes. Reducing creosote means addressing these.
This is the dominant cause of excessive creosote. Wood with moisture content above 20% contains water that must evaporate before combustion can occur. The evaporation cools flue gases, increases smoke production, and dramatically increases creosote deposition. Burning wood at 30% moisture produces 3-5x more creosote than wood at 15% moisture for the same heat output.
Seasoned wood has been split for at least 6-12 months (longer for dense hardwoods like oak), stored covered on top with the sides open to air, and ideally measured with a moisture meter reading under 20%. Wood with cracked ends, a hollow sound when struck against another piece, and a gray weathered appearance is typically seasoned. Fresh-cut wood, wood with green bark, and wood that smells strongly of sap is not.
Closing the damper too far, closing stove air intakes for overnight burns, or running airtight stove doors without adequate air produces smoldering fires. Smoldering fires have incomplete combustion — the fire produces more volatile compounds and less clean burn. These volatiles then condense on the flue walls as creosote.
The counter-intuitive lesson: a hot active fire with plenty of air produces less creosote than a cool smoldering fire, even though the hot fire burns more wood in the same time. For wood stoves, run the stove at appropriate temperature (250-475°F flue temperature) during active burning. Overnight low-and-slow burns are a creosote generation mode.
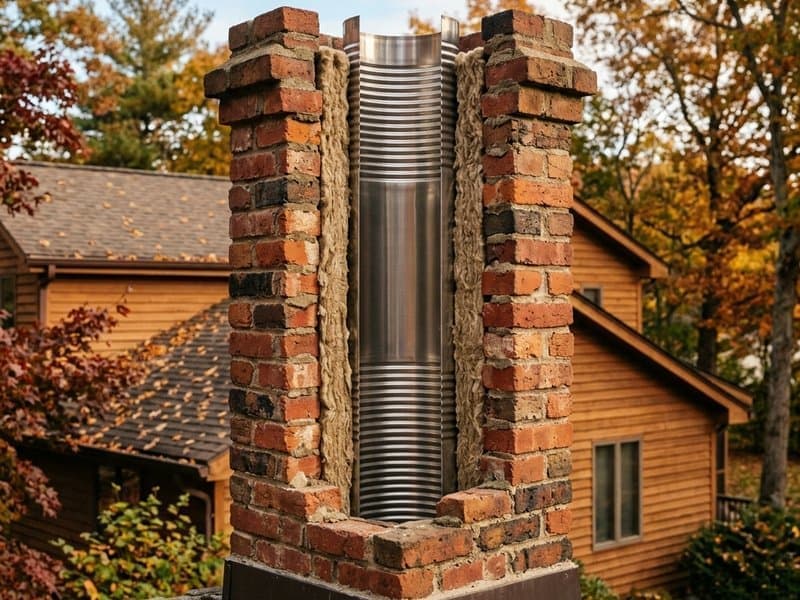
A flue that runs cool condenses more vapor as creosote. Three factors produce cool flues: exterior-wall chimneys (masonry against outside air), uninsulated stainless liners (no insulation between liner and outside air), and oversized flues (large diameter for the appliance output, so gases cool faster as they move up).
Insulation around a stainless liner keeps flue gases hotter through the run, reducing creosote deposition. Proper flue sizing — matching the liner diameter to the appliance specification — reduces condensation. Exterior-wall chimneys cannot be easily relocated, but insulated liners partially compensate.
This overlaps with Cause 2 but deserves separate mention because it is primarily a behavior issue rather than a hardware issue. Operators who leave a fire to smolder unattended, or who pack the stove full and close the air down at bedtime, are running in a creosote-generating mode. Active fires with visible flames produce less creosote than coal-bed smoldering.
Unusually short chimneys (under 10 feet of flue run) or flue designs with significant horizontal runs or offsets produce draft problems that promote creosote accumulation. Fixing this usually requires chimney extension or redesign, which is outside routine maintenance. If you burn wood and your chimney is short or has complex geometry, budget for more frequent sweeping.
The five practices that prevent excessive creosote accumulation. Implementing these reduces creosote generation by 70-90% compared to the worst-case operation.
Split your wood 6-12 months before burning (longer for oak and other dense hardwoods). Store under a roof with open sides for air circulation. Purchase a moisture meter ($20-$30) and spot-check wood before burning — readings above 20% mean the wood needs more drying time. Seasoned wood alone addresses 50-70% of excessive-creosote problems.
Run stove flue temperatures in the 250-475°F active burning range (a magnetic flue thermometer is the standard tool, $15-$30). Avoid closing the air supply so far that flames disappear — visible flames are the indicator of adequate air. If you want long burn times, choose denser hardwoods rather than restricting air.
Open the damper fully during active burning. Leave stove air intakes open enough to maintain visible flame. Do not pack the stove so full that air cannot circulate around the wood. A well-ventilated fire is both cleaner-burning and more efficient per pound of wood.
Insulate stainless liners when retrofitting wood stoves. Consider exterior-chimney insulation retrofits if your chimney is on an outside wall in a cold climate. Warm flues condense less vapor, producing less creosote per pound of wood burned.
The single most reliable creosote-management practice. An annual sweep removes Stage 1 accumulation before it has the chance to progress to Stage 2 or Stage 3. Annual sweep cost ($150-$300) is a small fraction of the cost of Stage 2 or Stage 3 remediation — and prevents the fire risk associated with those stages. See how-often-chimney-sweep for the full discussion of sweep frequency.
The removal method should match the stage. A standard brush sweep on Stage 3 glazed creosote is ineffective; chemical glazeaway on Stage 1 flaky creosote is overpriced.
Rotary brushes or rod brushes worked through the flue from top and bottom. The mechanical action dislodges flaky Stage 1 creosote, which falls to the smoke shelf and is vacuumed out with the rest of the sweep debris. This is the standard service included in any annual sweep.
A chemical creosote remover is applied to the flue — either as a powder burned in the firebox (Anti-Creo-Soot, CSL, or similar) or as a spray applied directly to the deposits. The chemical catalyst breaks down the hardened Stage 2 creosote, converting it to a form closer to Stage 1 that can be mechanically removed. After 24-72 hours, a thorough sweep with rotary tools removes the treated deposits.
Glazed creosote requires professional chemical glazeaway products that are significantly more aggressive than Stage 2 chemicals. Products like Poly-Glaze Eliminator or PCR are applied directly to the glaze, allowed to penetrate for 24-72 hours, and then mechanically removed with rotary chain whips or high-impact brushes. Multiple treatments are sometimes required for thick glazes.
In worst cases where Stage 3 glaze cannot be fully removed — the glaze is too thick, too old, or the underlying liner is damaged — liner replacement is the final remediation option at $1,500-$5,000. This is rare but is the eventual outcome for chimneys that were never swept for many years of heavy wood use.
Creosote removal logs — CSL, Rutland, and similar products sold at hardware stores — are a partial solution, not a replacement for professional sweeping. Understanding what they actually do helps you use them correctly.
The logs contain chemical catalysts that, when burned, produce vapors that partially break down Stage 2 hardened creosote, converting it to something closer to Stage 1 flaky creosote. The treated creosote is easier to brush away during the next sweep.
They do not remove creosote on their own. The chemical action only converts the creosote to a form that brushing can remove — the brushing still has to happen. Marketing that implies the log "cleans the chimney" is overstated. The log is a pretreatment, not a treatment.
They do not work on Stage 3 glazed creosote. The chemistry is not aggressive enough to break down heavy glaze. Using logs as a response to Stage 3 is a delay that usually makes the eventual remediation more expensive.
They do not substitute for professional inspection. A log treatment tells you nothing about crown condition, liner integrity, cap condition, or flashing — all of which a professional sweep observes during the visit.
Regular light use — one or two logs per burning season as a maintenance tool between professional sweeps — has modest benefit. The logs reduce Stage 1-to-Stage 2 progression slightly and make the eventual sweep easier. For homeowners who burn wood frequently in marginal conditions (cool climate, exterior-wall chimney, occasional unseasoned wood), the logs are a cheap addition to a serious maintenance program.
They do not replace the annual sweep. If you are using creosote logs instead of having your chimney swept, you are delaying a more expensive future problem.
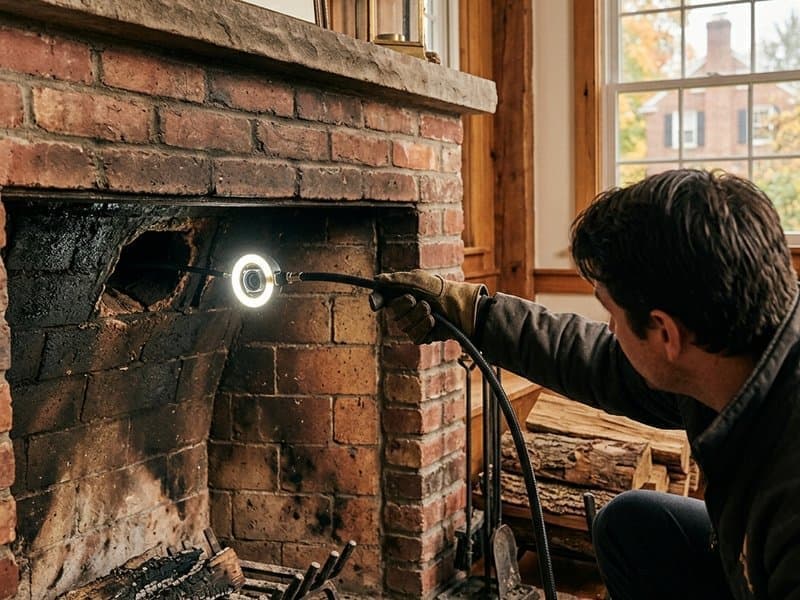
A 10-minute self-inspection gives you a useful baseline before meeting with any operator.
Flashlight, small mirror, old clothes, dust mask. Optional: a screwdriver or similar tool for scraping a sample.
Document what you observe with photos. This gives you independent evidence to compare against any operator's findings.
Understanding the mechanism of a chimney fire helps make the case for prevention. A Stage 3 chimney fire is not a distant theoretical risk — it is the failure mode that causes the 22,000 annual US residential chimney fires.
A stray spark, an over-hot fire, or a piece of burning wood disturbed into contact with the flue wall can ignite accumulated creosote. Once any section ignites, the fire spreads rapidly along the creosote-coated interior. Flame temperatures inside the flue rapidly exceed 1,500°F and can reach 2,000°F within minutes.
A loud roaring sound like a freight train. Visible flames or sparks at the chimney top. The chimney mass itself heats audibly and may vibrate. Smoke density at the cap increases dramatically. Residents often describe the sound as one of the most frightening they have experienced.
Clay tile liners crack from the thermal shock (the temperature differential across the tile thickness during a rapid heat spike is extreme). Stainless steel liners below 316Ti grade can warp. The surrounding masonry absorbs heat and transfers it to adjacent framing members. In the most severe cases, framing ignites and the fire spreads from the chimney to the building.
If you experience a chimney fire, call 911 immediately. Leave the house. Do not attempt to extinguish from the firebox side — the fire is in the flue, not the firebox. Fire departments have specialised techniques for chimney fires that homeowners do not.
After any chimney fire, a Level 2 inspection is required under NFPA 211 before the chimney can be used again. The inspection assesses whether the liner survived, whether the masonry is intact, and whether relining or repair is required. See inspection-levels for Level 2 scope details.
The best chimney fire response is prevention: annual sweeping and appropriate burning practices that keep creosote from accumulating to dangerous levels in the first place.
Browse 29+ guides, or jump straight to verified operators in your state.
How often should you clean your chimney? The direct answer from NFPA 211, broken down by fuel type and usage — plus when annual sweeps are a scam.
Level 1, 2, and 3 chimney inspection per NFPA 211 — what each includes, when it's required, cost ranges, and how scammers exploit the Level 2 designation.
Chimney liner materials compared — clay, stainless 304 vs 316Ti, cast-in-place, aluminum. Costs from $10/ft to $7,000 installed. The full technical reference.